5 Steps to Film Photography for Beginners
From the first camera obscura to Instagram, photography has always fascinated us. It is an art, a way of expressing ourselves and making memories. So, if you feel like something is missing from today’s Insta Stories and TikToks, maybe you should try film photography.
How Do You Start Film Photography
First, you buy a film camera and a photo film. Then you learn the basic film camera mechanics and film sizes. You start tinkering with the camera settings and start experimenting and enjoying your new hobby.
Or you take up a course in film photography for beginners.
There’s also a third option. You do what your heart tells you to do and explore the many possibilities of film photography with us. Before going on an impulse to buy the first film camera you can find, you’d better ask yourself what you want to experiment with first. More than that, why do you want to start taking film camera photos?
Film Photography Can Teach You So Many Lessons
First of all, film photography will teach you patience and focus. Unlike digital cameras or your smartphone, you obviously can’t see the photographs right away with film cameras.
This will make you think twice before releasing the shutter. So, a photo is no longer a thing you can do and re-do a thousand times. It becomes a one-shot. It’s suddenly more important than you’ve imagined.
Secondly, film camera photography will make you feel more connected with your photos. Now, it also depends on how involved you want to get. If you also want to unload and develop the film yourself, you’ll get even more intimately connected with your work and its aesthetics.
Thirdly, most film cameras (SLRs) are entirely manual. That will teach you patience and the basic concepts of exposure.
You probably have heard people say that digital cameras can’t replicate analogue photography colours and tone. Well, that depends on taste, but there is indeed something different and unique about film photography aesthetics.
Analogue photos are visibly warmer than digital pictures. We’re talking about the warmth of colours and exposure that digital cameras can’t get. It’s true, you can replicate the film photography visual aesthetics in an editing program, but it’s not the same feeling.
So, if you find yourself in these, then it’s time to get started with film photography.
Film Photography Guide In 5 Steps
Ok, so now let’s get down to the more specifics. It is important that you enjoy film photography, so you’d better choose the type of photography you want to try first. Do you want to be a casual shooter of natural landscapes? Do you want to shoot portraits? You should pick a topic before starting out. Maybe you want to photograph cars. So, begin with that in mind.
Once you’ve set your personal goal, it’s time to get down to the specifics.
1. Choose your film camera
There are three options here. If you want to go safe and normal, then the 35mm film photography is for you. Another fun option is the instant camera. If you’re a more adventurous type, then you might want to try your luck with 120 cameras.
Let’s take them one by one.
35mm Film Camera
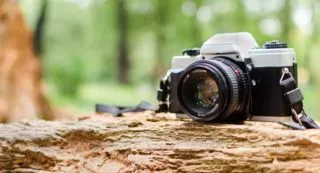
The 35mm film camera is the regular camera you’re used to seeing everywhere. You can find a decent one for a reasonable price, and it’s not rocket science to use it.
In fact, many aspiring photographers have started with a film camera such as a Pentax K1000 because it’s more affordable than a DSLR (Digital Single Lens Reflex)
Now, there are a lot of things to say about SLRs. The best advice would be to make sure you test the camera before you buy it. If you’re looking for one online, then only purchase from sellers or resellers that let you return the product.
How do you test the camera? The most important thing is to see if the shutter flies. Secondly, the aperture should open and close correctly. These two mechanisms usually wear down when it comes to a film camera.
Instant Film Camera
The digital photography era has wired us to believe that we need to see the photo right after it’s been taken. You know, to make sure it looks ok.
Nevertheless, some of the best memories come from badly-taken photos, you know. Everyone has one. At least, everyone who is a bit older than Facebook.
You would climb 200 stairs to photograph yourself on top of a mountain and then come down happy. When you developed the film one week later, you realized there was too much exposure, and the photo was terrible. Or you were sitting contre-jour. But who cares? You were there, you took a not-so-perfect photo, and you have a funny story to tell your friends.
However, if you were not a big fan of funny stories and spoiled photographs, you could choose an Instant film camera.
Polaroid, right! But there are also some Fujifilm instant camera options available today. They still make them, they’re called Instax, and they also make the film for them.
Nevertheless, it still takes up to 20 minutes to develop a photograph. After taking the picture, you need to quickly pull it out of the camera and keep it away from the sun or any intense light source.
Imagine how these photos will look framed in a gorgeous black photo frame!
12O Camera/ Medium Format Cameras
Medium format film is more challenging. A 120 film is about 6cm wide. There are also other medium format films like 127, 126, 620.
So, the film is basically three times bigger than the standard 35mm you’re used to. That also means the amount of details you get for each picture is superior to 35mm film.
Nevertheless, medium format cameras are more expensive and more difficult to understand and operate.
2. Choose your film
Well, films can be confusing because there are a couple of criteria to base your choice on. First of all, there is the size/format. Secondly, you need to know the film type (the resulting image). Thirdly, you must decide on the ISO (light sensitivity).
Films Formats
Well, there are tons of film formats, but the most common is 35mm. This is the one we recommend you start with. It usually comes in 36 or 24 exposure rolls. Once you’ve finished the whole role, you need to wind it back into the canister before developing it.
The 120 is the conventional medium format size. You also need a special 120 camera for this film, and it won’t rewind when completed. You can get between 8 and 16 images with one roll; it depends on your camera mostly.
There are also larger film formats. Professionals use these for landscape photography or portraits. So, it’s better if you leave them aside for later.
For more information on picture and canvas sizes, read our extensive Picture Frame Size Guide.
Film Types
There are three:
- Black and white films – for monochrome pictures; you need a particular type of chemical to develop them
- Colour negative – orange-tinted images with inverted colours (aka C-41 films)
- Colour positive – you get the coloured, vivid pictures
Light Sensitivity (ISO)
This is how you can tell how sensitive the film is to light. There are films with 50, 100, 200, 400, 800, 1600 and even 3200 ISO.
So, low-ISO films (from up to 200) are best for outdoor and sunny days. They have less grain, so your landscapes or portraits in the sun will look perfect.
High-ISO films (AKA fast speed films, with at least 400 ISO) are best for the indoors or for shooting moving objects. They have more grain (noise).
For the best 35mm film photos, we recommend you start with 200 ISO as a beginner.
3. Choose your developing method
After your first roll of film is done, we recommend you send it to a lab. Start like this, so you can only focus on taking photos.
When developing the photos at a lab, you also have a couple of decisions to make:
- You only develop them to get the negatives
- You develop and print them, so you’ll receive the negatives and the photos printed on photography paper
- Develop, print and scan them, so on top of the negatives and prints, you also receive a digital copy of your pictures.
If you come to truly love film photography, then you can start developing the images at home. Start with 35mm black and white photos. It’s the most straightforward process. As for materials, you can order the whole kit. Colour negative film development is called C-41. The black and white negative film developing process is BW, and the colour positive is called E-6. You can purchase kits for each of them.
4. Master the Exposure Settings
It might seem odd that this step comes only fourth, but we recommend you have a little fun with film photography at the beginning. Once you begin to like it, it’s time to learn more about Exposure, Shutter speed, ISO and aperture.
There are a lot of things to learn here, but you can start with the Sunny 16 Rule. This is one of the oldest rules in digital and film photography. So, according to this rule, when there is a sunny day outside and you’re shooting at the f/16 aperture, the shutter speed should be the inverse of your ISO.
You have to understand light, as photography is basically “painting with light”. The aperture opens from f/1.4 to f/2.8 and can go all the way until f/22.
The shutter speed starts from 1/125 s and can go up to 1/4000 s. ISO can also jump from 100 to 200 and all the way up to 3,200.
To understand what all of this means, we recommend you study the exposure triangle.
5. Learn to Use a Light Meter
A light meter can basically measure the “quantity” of light that hits your subject. Without it, you cannot say for sure how light or dark your surroundings are.
Some cameras do have a reflective light meter built inside. This type of light meter will help determine what camera setting to use to get a balanced exposure.
But if you want to really learn about light, then get an incident meter, which is an external device. It is more accurate and fun to use.
Moreover, you’ll learn a lot about film photography using it.
So, how do you feel about starting film photography now?
